How to Migrate a Website from Hosting to another without any error in simple steps. Today I am going to teach you that how you can migrate your WordPress website from one hosting to another hosting in simple steps with the help of a Plugin.
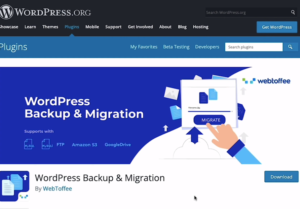
By Using WordPress Backup & Migration Plugin
This tutorial will take you through the complete process of migrating your WordPress site using the WordPress migration and backup plugin. This plugin will let you backup and restore your word press website or migrate your WordPress site from one location to another. first, let’s see how we can do a manual backup of your WordPress website, and then we will discuss how to schedule a backup later in this article.
You can start by installing the plugin on the website that you need to migrate or backup. now from your WordPress dashboard navigate to the menu WordPress migration click the sub menu backup and migration. This will take you to the backup settings window of the plugin here you can see two options one is for one-click backup and the other for a scheduled backup.
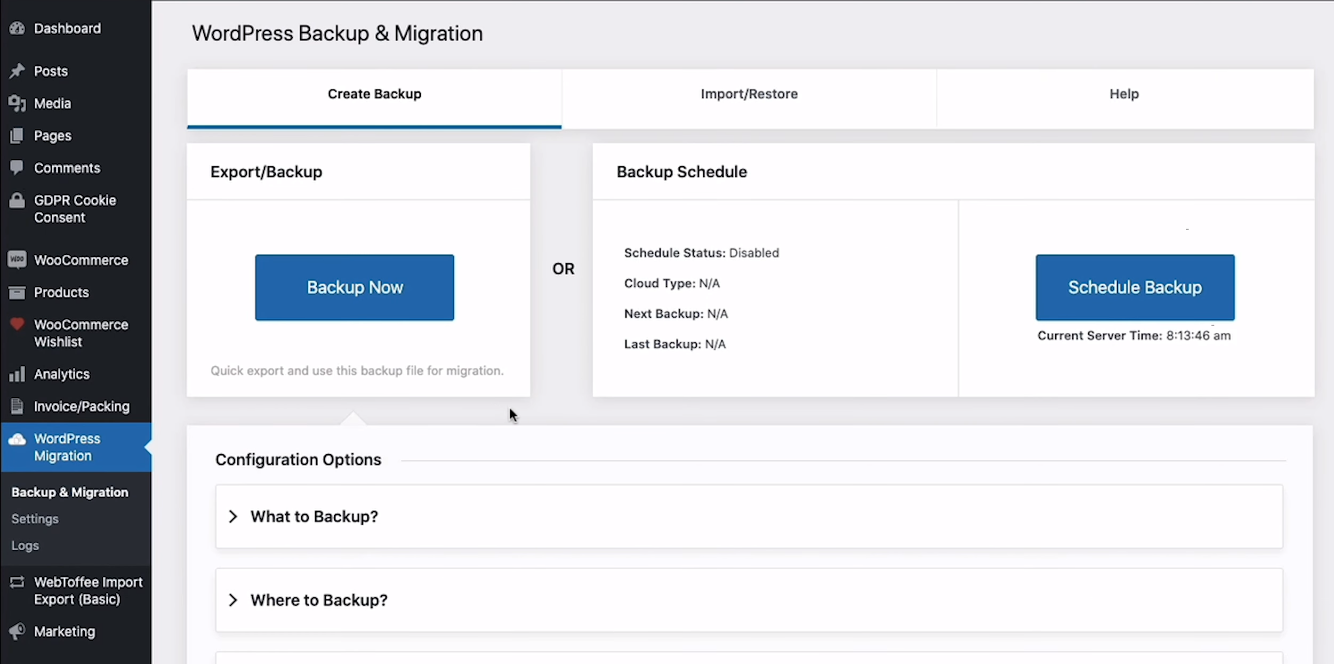
If you click on the backup now button you will be able to back up your entire word press site at once. All its files and database will be backed up locally. But the plugin also offers provision to backup selected content into selected locations. what to backup section lets you choose the website content that you need to backup. You can choose database-only backup or files-only backup on the left side of this section.
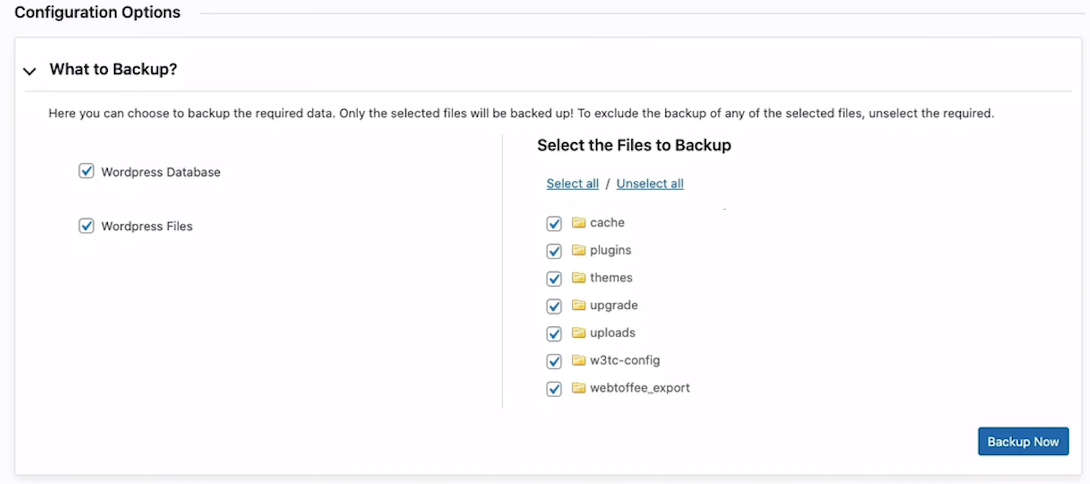
you can choose which folders or files you need to backup just tick the box next to the files or the folders that you want to backup. Furthermore, if you click on the folder it will expand to show all the files within it so you can back up only the selected files in the folder the files or folders you leave unchecked will be excluded from the backup. Up next from the where to the backup section you can choose from locations such as local storage FTP/SFT, Google Drive, or Amazon S3 three to backup your site. Before you choose any of these locations for storing your WordPress backup you need to connect and authenticate them with the plugin.
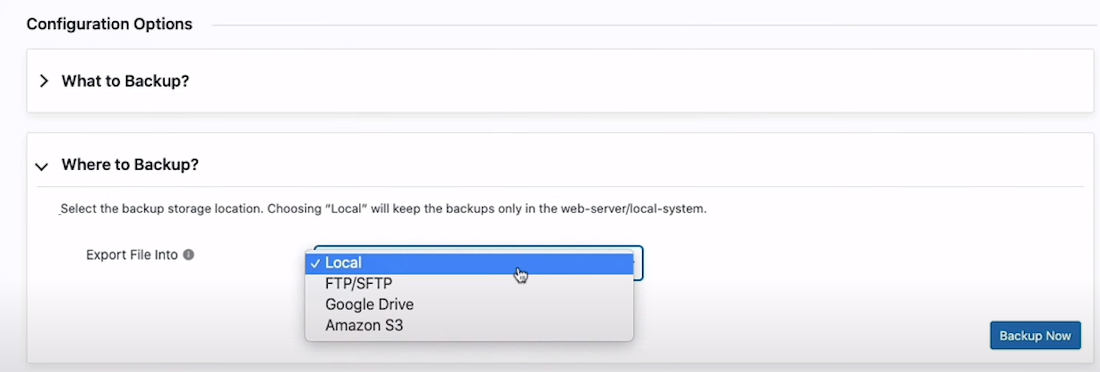
For or that you can go to the setting section within the plugin to enter the required credentials for your FTP, Google drive, and amazon S3 accounts where you want to store your word press website backup and click the authenticate button.
How to Take Schedule Backups of WordPress
Next, let’s see how you can schedule backups using this plugin on clicking the scheduled backup button you will be able to configure automated backups. The options provided will help you to choose the location where you want to store the backup you can schedule your backup a daily weekly or monthly intervals at your preferred time.
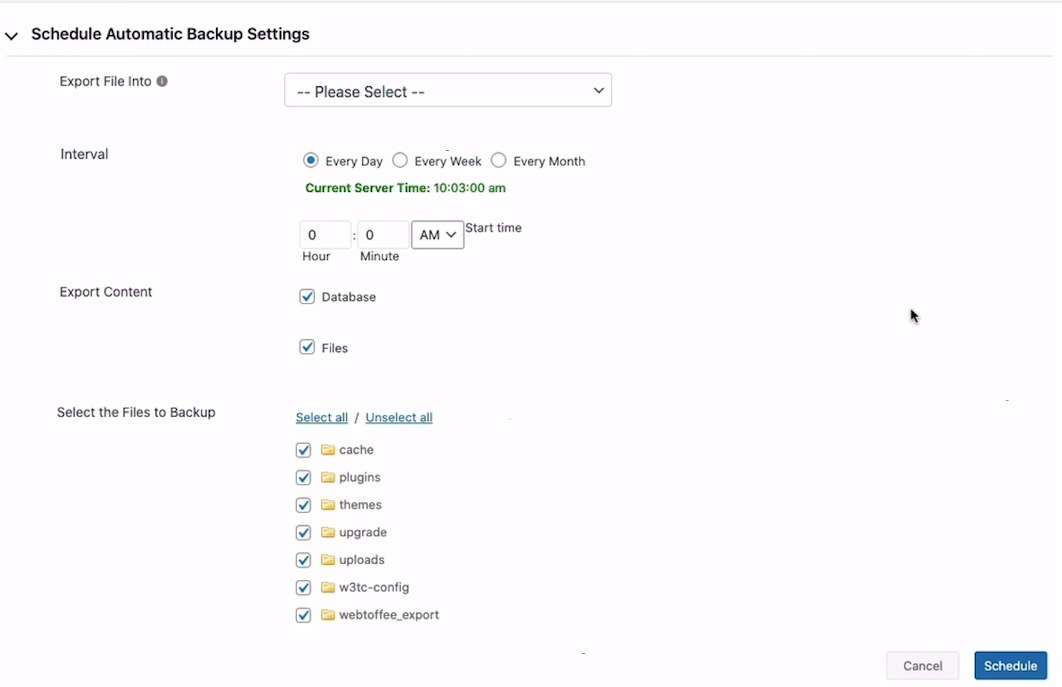
You can also choose which files you want a backup in the automatic scheduled backups the advanced options section is for matching the number of files processed during backup with that of your server performance doing. So ensures a smooth and fast backup if you have a high-performing server you can increase the file size the number of files and the number of database records accordingly.
But if you are sure about your server performance you don’t need to make any changes and can proceed with the default values.
How to Restore your Old WordPress Site to New Hosting
The next part in migration is restoring backup data to the new site to restore you need to install and set up the plugin within the destination site. Go to backup and migration click the import or restore button at the top this will open up the restore settings of the plugin. It’s further divided into three sections import recent backups and advanced options on expanding the import section you can choose the backup file from where it was stored in all four locations.
Local FTP Amazon S3 and google drive will be available in the drop-down. The recent backups section lists all the backups you have carried out what the plugin on your current site it contains the download link for each backup file the date on which the backup took place backup file size. its location status and options to restore or delete any backup entry the advanced options settings can be configured to meet your server performance during restore.

But if you are unsure about it you can leave it at the default values once you are all set you can see scroll up and click the import button at the bottom. The right corner of the imports section initiates the import or restore process for those completing the entire migration process.
